Monday, June 14, 2010
Monday, June 07, 2010
Stitched Design Three, Chapter Seven

Here is my third stitched sample. It is actually more like 5 by 9 inches as it is doubled. It is on kunin felt with purple commercial fabric and hand dyed (purchased in Japan) muted yellow on top.
Although I thought that I had centered the pattern on the felt, I made a mistake and only left 1/2 inch of felt on one side.
I really like the pattern created by doubling this design. The two together are much stronger than just a single repeat. I used a vanishing/wash away thread to baste again.
On the purple layer I used Splender #5 twisted silk thread. It was a 10 yard package and I barely had enough to finish! I used a chain stitch for a bold outline on the purple which I wrapped with a lighter purple.
Stitched Design Two, Chapter Seven

I really started having fun with this piece. I used the fused fabric that had been run under the Embellisher as the bottom layer. I love the texture. I stitched this down with two strands of Splender, a stranded silk in stem stitch with the inside shapes done with backstitch as it wasn't as bulky under the top layer.
I stitched the top layer with a muted lavender linen thread in backstitch. After cutting away, I added buttonhole and french knots in the center of the yellow to pull the purple into the middle and I added the buttonhole on the outside to try and integrate the design with its background. I also added tiny french knots in Sulky gold metallic thread around the "hearts" and then wrapped the outer points with it too.
Stitched Design One, Chapter Seven

I wanted to keep the first one on the simple side. I am not great at hand embroidery and so I have decided to really emphasis the hand embroidery on these samples. At the beginning of the exercise, I didn't understand why we were asked to transfer the designs on to the back of the muslim and then baste each layer on the top before stitching. This was is much more accurate with whole cloth cut-away. On the top, I hand basted with cotton thread on the bottom layer and hated pulling those basting threads out. On the top layer, I used YLI Wash Away thread to baste. I still removed most of the basting by hand, but those hard to get bits were dissolved with a wet Q-tip. On the bottom layer, I used a stem stitch and on the top I used a double row of back stitch.
Fused Designs, Set Two, Chapter Six

Both of the top two designs use the same fabric. The fused purple and the back of a commercial fabric. The right design is lost with the blue over powering the sheer instead of enhancing each other. The left design was my attempt to move away from a nice design plunked into the middle of a piece of background fabric.
The bottom right design uses painted wonder-under as the bottom layer.
Fused Designs, Set One, Chapter Six
Both designs on the left use the blue fused fabric; however, with the top design, the fabric has been needle-punched with the Embellisher to distress the sheer fabric while the bottom design was not.
The top row right design uses hand-dyed scrim as the bottom layer
The bottom right design was not that strong on an image until it was repeated. The background is an embellished kunin felt with fused tissue paper as the bottom layer. The top layer is the tulle with the painted wonder-under.
Tuesday, June 01, 2010
Module One, Chapter 6, Bonded Fabric
 Far left fabric is a sandwich of light blue nylon tulle sprinkled with Bo-nash powder with small scraps from my paper cutting exercises. I didn't like the white spots created when the bonding powder melted so I took some gold foil and foiled the piece too.
The right fabric is two pieces of yellow nylon tulle with snippets of dmc stranded thread and gold thread held together with bonding powder.
Middle left piece is painted wonder-under on yellow tulle.
Lower left bonded fabric was created with a bottom layer of commercial purple fabric. On this I ironed some lightly painted wonder-under and then added a layer of snippets of blues and purples, as well as gold thread. I then added more bonding powder as the snippet layer was so thick, and topped it with a piece of nylon sheer. When I actually used this piece in my fused sample and again in my stitched sample, I used the embellisher to distress the sheer and remove the "high gloss".
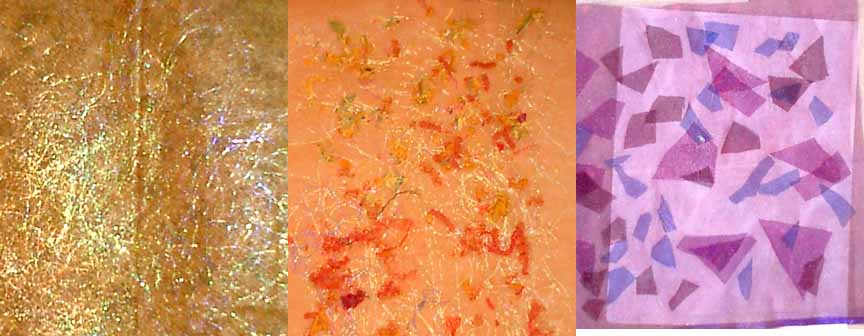 The far left piece is a commercial print fabric with angelina fused with wonderunder. I then addded a layer of sheer on top.
Middle layer is a heavier netting with snippets and covered with tulle.
On the far right, is two layers of sheers with snippets of other sheers sandwiched between them.
Module One, Chapter 5, Painted Fabric Two
 Here is a set of my painted fabric. I really like working with tone on tone and realized that the majority of my fabric was orange/yellow on orange/yellow or blue/purple on blue/purple! I made several new fabrics with the compliments. I really liked them.
I also experimented with different ways to color the fabric. I came close to using thickened fabric dyes, but decided that it would not be "learning" to use ways that I was most familiar with and so I used several Golden Fluid acrylic paints, Lumerie (another acrylic), Stewart Gill acrylic, and Dye-na-Flow. I really didn't like the Dye-na-Flow as it didn't keep the detail. I also tried Fabrico stamp ink. It advertises as being color fast on fabric. Both of the bottom two fabrics were done with these inks. I think they were not only the easiest to work with but also kept the most defined edges.
Module One, Chapter Five, Fabric Collection

Here is the beginning of my fabric collection. Most of the cottons I hand dyed for this module. I also dyed cottons, silk, burlap, and stranded floss together. The burlap didn't take the dye well as it had been pre-treated (I bought it off the remnants rack at the fabric store) and has blotches, but these can probably be worked into the design. The upper left piece is a gorgeous woven wool. Since this time, I have shopped for more fabric and purchased yellow, purple and blue tulle (nylon) and several colored nylon sheers.
Painted Fabric, Set One, Chapter Five

All of these fabrics are cotton and most were some of my own hand dyed fabric. I used fabrico inks and Golden Fluid Acrylics with my stamps. I really liked adding several colors and shapes together.
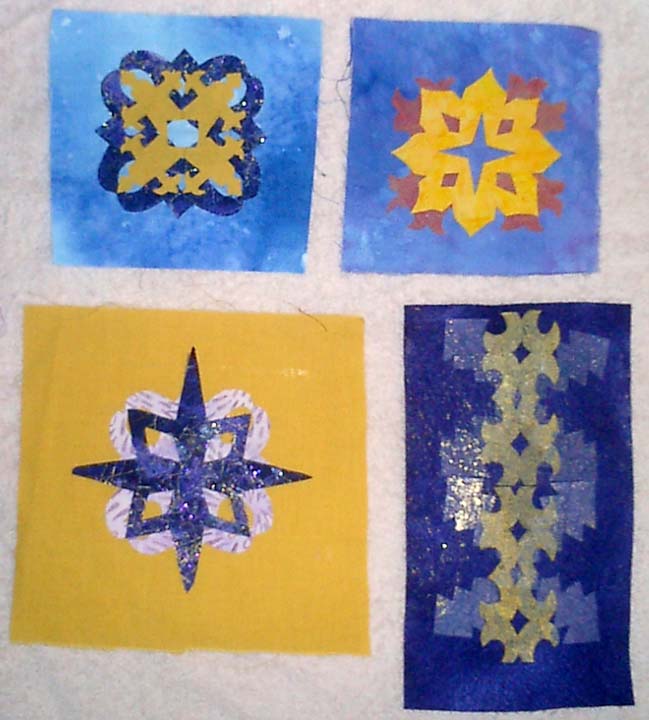
Colored Paper Cut Outs Set Two
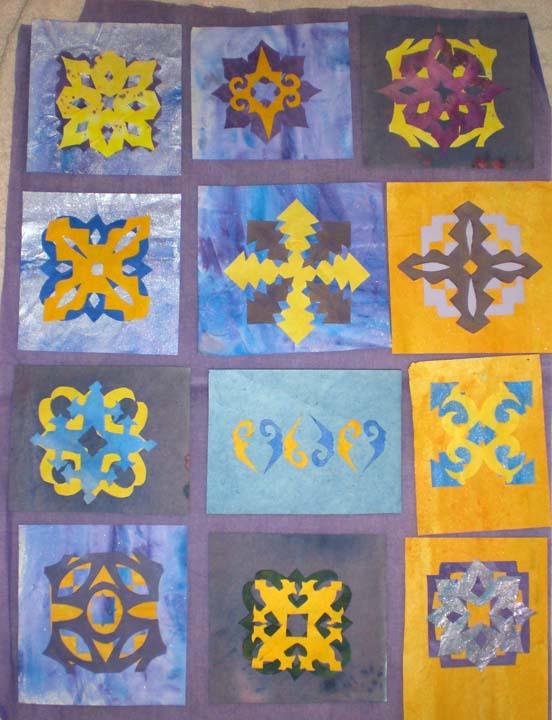 Here is another set of my paired designs. I really do like them. I think the biggest weakness is that there isn't a lot of visual variations between the designs. They are all, except for third row middle, a centered motif, similar to a quilt square. As I develop designs, I really want to find ways to integrate the entire space. On the stitched sample that I worked on this weekend, I began to work with the background more to make it more of a part of the design, not just a pretty pattern slapped onto any old background. Suggestions???
Paper Cut Outs Sketchbook one


These are some of th images from my sketchbook for this chapter. I scanned the individual colored shapes into photoshop and manipulate and auditioned the different pairing on my computer. It made it so much easier to see more variations, and a lot faster.
I was also able to play with repetition and the patterns that multiples created. Unfortunatley, I did not have my printer on "contrain proportions" and it skewed them a little. Although I like the original patterns that were created, I also like these too.
Colored Paper Cut Outs Set One

Here is the first design sheet. Each is approximately 4 inch square. I ended up scanning most of the individual colored shapes into Photoshop where I was able to manipulate them on the screen. Because of this, I was able to quickly see lots of different variations and then see what would happen with repeating the pattern. I have included some of the print outs of these manipulations on another post.
Black Paper Cut Outs 3, Module One, Chapter Four

Black Paper Cut Outs Set three
I really liked this star shape and wanted to see if there were any good designs that I could make from it. The upper left design was cut from tissue paper. I wanted to see if I could make a more repeat pattern, but couldn't with the thicker black paper that I had on hand.
Black Paper Cut Outs 2, Module One, Chapter Four
Black Paper Cut Outs Set Two
These are some of the black paper cut outs. I REALLY enjoyed this exercise and could have spent months just making them. I am glad I finally moved on as the next ones were even better.
These are some of the black paper cut outs. I REALLY enjoyed this exercise and could have spent months just making them. I am glad I finally moved on as the next ones were even better.

Subscribe to:
Posts (Atom)